


 Anna Mary Robertson, AKA Grandma Moses, is the perfect inspiration for a folk art lesson for children. This landscape project can be used for any season for teaching layering and overlapping. With holiday season approaching it’s a fabulous time for a fall art project. Both fall and winter scenes are especially fun scenes for kids to create. Many of Grandma Moses’s paintings have holiday themes too. I am also taking this lesson as an opportunity to introduce how to draw three dimensional buildings because almost all of her paintings include farm houses or buildings as well.
Grandma Moses for Kids: Art Appreciation
I always introduce my students to the artist first. I find a simple biography I can share with them and then we take a look at a few of Grandma Moses’ paintings such as Catching Thanksgiving Turkey, Sugaring Off, Apple Butter Making, Halloween, Pumpkin Apple Village and more.
Share a Quote from Grandma Moses
For Grandma Moses, I found the perfect quote from her which inspired this tutorial:
I paint from the top down. From the sky, then the mountains, then the hills, then the houses, then the cattle, and then the people.
I will use this Grandma Moses Copywork Quote for my co-op class as a handout. This quote seems the perfect way to introduce children to layering their project “from the top down”. Each layer will be placed in just that order. Layers will overlap so that only objects in front can be seen. The foreground objects will be larger than those behind giving a great introduction to perspective as well.
Vocabulary for this lesson: overlapping, layering, perspective, folk art, landscape, three dimensional, cubes, foreground, background, parallel and perpendicular. I try to use and explain these terms as I go.
 Grandma Moses Fall Landscape for Kids
I don’t like asking kids to do projects that require skills they have never done before. Therefore, I give them a few minutes to practice some of the skills they will apply to this project.
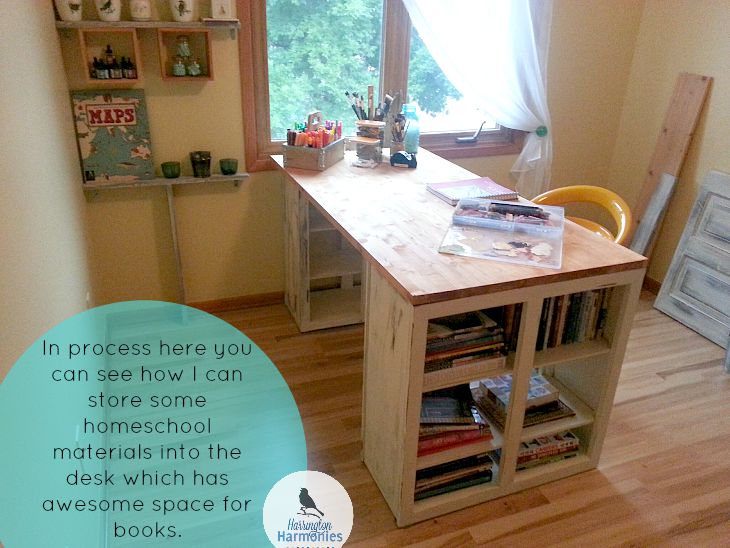
- 3-D shapes and drawing 3-D buildings- using a homemade “dot to dot” hand out I taught my students to make a 3 dimensional building for their landscape.
- Making trees and branches- I’ll introduce my students to drawing tree branches so they can draw and finish the tree trunk in the project. They will learn the size will be according to whether the tree is up close or far away.
 What you need for this Grandma Moses Fall Landscape for Kids
For this lesson you will need for each student:
- 9 x 12 inch tag board paper
- pre-cut from construction paper: hills ( light brown or manilla) and an up close tree trunk (brown or gray)
- glue sticks
- mod podge- for gluing and adding embellishments at the end
- any colored construction paper for one or two buildings
- stickers and other 3D embellishments for the season of your choice, in this case Autumn
- tempera paint for your sky color- mix with water so it’s thin like a color wash ( light orange to yellow for fall)
- additional paint or drawing materials for adding pumpkins, etc. to your scene
“From the Top Down” Like Grandma Moses: Fall Landscape Tutorial
First choose which season you want to focus on with your students/children. This will dictate your color choices. Since the timing now is best for fall this tutorial will focus on creating the project as a Fall Landscape.
- Start from the top down, just like Grandma Moses. Paint a colored sky from the top of the paper down to just past the middle and stop. * NOTE: When in a co-op setting I do this step first thing, even before the artist study so that it allows time for drying before having to glue anything. While waiting for them to dry, I then begin the lesson starting with artist study.
- Once the top is dry we work our way down to the hills next. Using pre-cut construction paper hills, have your student add hills with a glue stick. This holds them in place till later. The hill that is overlapping the hill behind it would be the closest and the hill behind is farther away. When something is in front of another object, we can’t see it. This is overlapping.
- Next have children glue the tree trunk on the foreground right and add branches with marker. (I have them practice making branches as part of their warm up exercise.) Mention that the tree will be the largest thing in their collage since it is up front. If they want to add trees in the back they will need to make them small so they appear far away.
- Next you can add as many 3d houses as you like. (Making 3-D houses is another practice exercise.) Place them properly for their size. The smaller they are the farther away they are. If they are behind the tree then they can not be glued on top so avoid placement near the large tree.
- Now things get fun. Use stencil craft brushes to add fall leaves to the trees. Blot and dab only, do not use brush strokes. Use the right color tempera paint for the season of your choice. Once dry enough, add embellishment such as animal stickers, people or flowers. Children may draw these also. Use mod podge to add any paper cut outs in the case you aren’t using stickers.
Extend your lesson for grandma Moses.
You can use these wonderful resources for your Grandma Moses lesson as well:
- Grandma Moses for a lesson in perspective from Our Journey Westward.
- Grandma Moses ideas and landscape project on wood from Teaching Stars.
- Grandma Moses word search
- Painting a landscape in the style of Grandma Moses
How to adapt this project for another season.

You can work from the top down adding the right colors and seasonal additions to your Grandma Moses Landscapes.
It’s very easy to do this project for another season. Simply change the colors to reflect the look you want.

Here I used Mod Podge to add fake snow.
For winter -use gray for the sky and white hills for snow. Add only bare branches for the tree. Add snowmen and snowflake stickers and fake snow over mod podge.

 For Spring– use light blue for the sky and manilla or light green paper for the grass. Add branches and pink tempera blotches for flowering trees. Add baby animals and spring flowers.
 For Summer– use blue for the sky, green for the hills, and add green blotches for the summer leaves on the trees. This makes a wonderful apple tree art project for apple unit studies and more. Use red dots for apples on the trees. Add apple stickers, bees, flowers and other things for a summer landscape.
Visit iHomeschool Network for more famous September birthday lessons and other link ups: Co-op Class Ideas Link Up, Hip Homeschool Hop, Trivium Tuesday, and Collage Friday- use #collagefriday!

[ Return to Lesson by Artist Index ]


9 Comments
Mary
Love this! Thank you — we are studying Grandma Moses right now in CC Cycle 3, so your post is PERFECT.
Stephanie
Awesome! So glad it’s helpful, Mary.
Jessica
This project looks great! Thank you so much for sharing!
Do you happen to remember how long it took you to finish all four seasons?
Blessings!
Stephanie
With my students, about 15 children in a classroom setting, I allowed them one hour to do one season and I precut the materials. But it would be much easier in a homeschool environment to complete more quickly. So for all four seasons I would allow a block of about 2 hours to complete all four. Maybe even less time if you do all the background water colors at the same time and complete the right tasks while step one is drying. Does that make sense?
Tiffany
These look like a lot of fun!!! I can’t wait to see what the kids come up with on Thursday!
Heather
Finally have a quiet day today at home….we are working on this project right now…so excited to see the results. Thanks for sharing.
stephanie
You are welcome! Thanks for commenting, it’s always nice to know that others are benfiting. Let me know how it turns out.
Amy
This looks like a really fun project and one that many ages could use (younger kids would just have a more simple finished product.) Thanks for sharing!
stephanie
Thanks Amy for stopping over and for hosting a fabulous link up community!