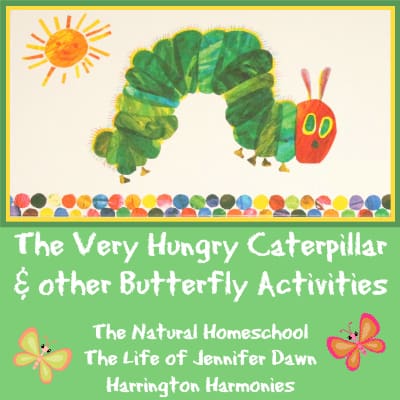
 What educator doesn’t love Eric Carle’s books and illustrations? We read them with our children and students because they have so much to offer, both the literature and the artwork. This post will focus on an artist study and art lesson, so it can be used with children older than the normal range for reading the picture books. It would also make a fun Friday art lesson for multiple ages.
Teaching Texture with Eric Carle:
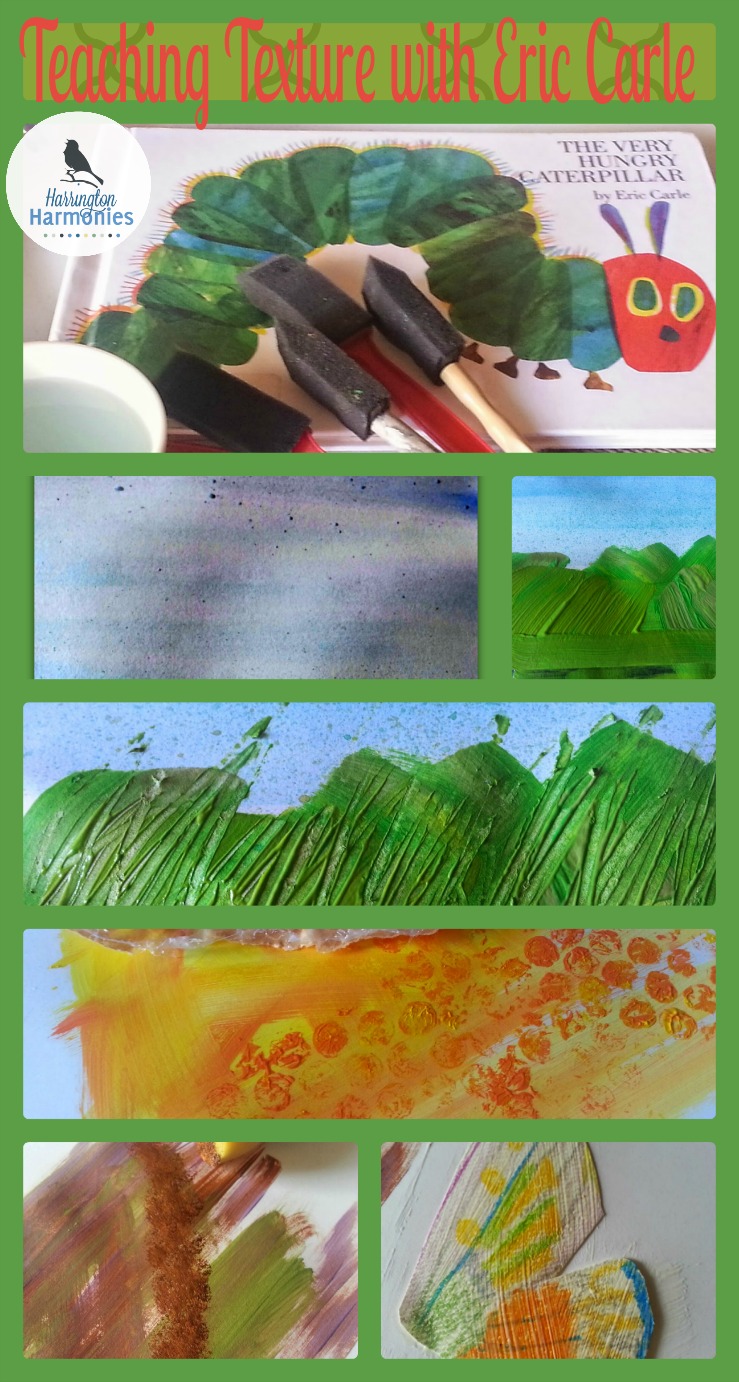
As I prepared these lessons it brought back fond memories of reading these books to my children when they were little. It has been a real joy to relive. Over the next week I will cover five texture techniques inspired by Eric Carle’s books: The Very Hungry Caterpillar and The Very Quiet Cricket
.
- Color Wash and Splash Textures ( You’re here)
- Brush & Scratch Textures – Tuesday
- Insect Textures– Wednesday
- Blotting Textures– Thursday
- Project Completion– Friday
By the time you get done Teaching Texture with Eric Carle, your children will be able to apply these textures to any insect art project of their own! So let’s get started!
 Texture #1: Color Wash and Splash Texture
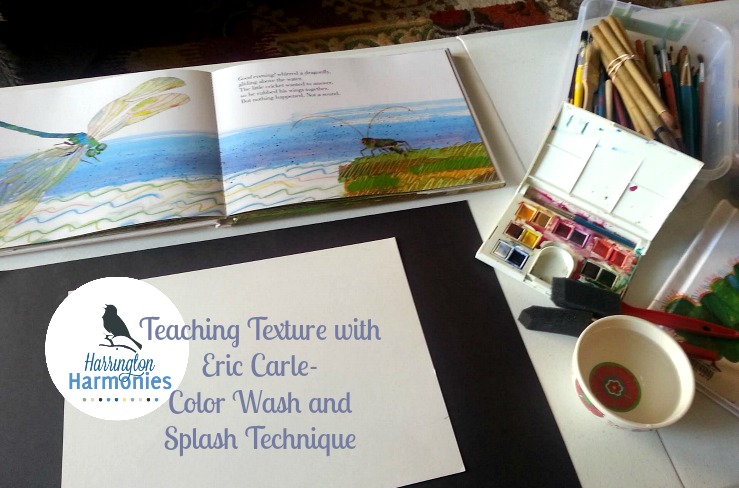
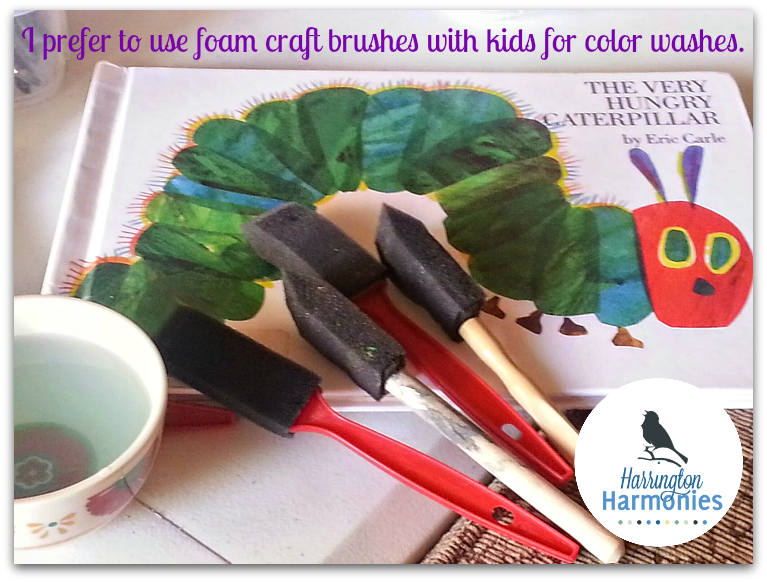
Materials needed: ⇒ White Multi Media or Watercolor Paper, Watercolors, Wide Craft Brush or Sponge, Tooth brush
Note: If you don’t have good watercolors you can substitute with almost any kind of paint except oils. Just be sure to add enough water to just a little color to get the same effect. Test it on scratch paper until you get what you’re looking for.
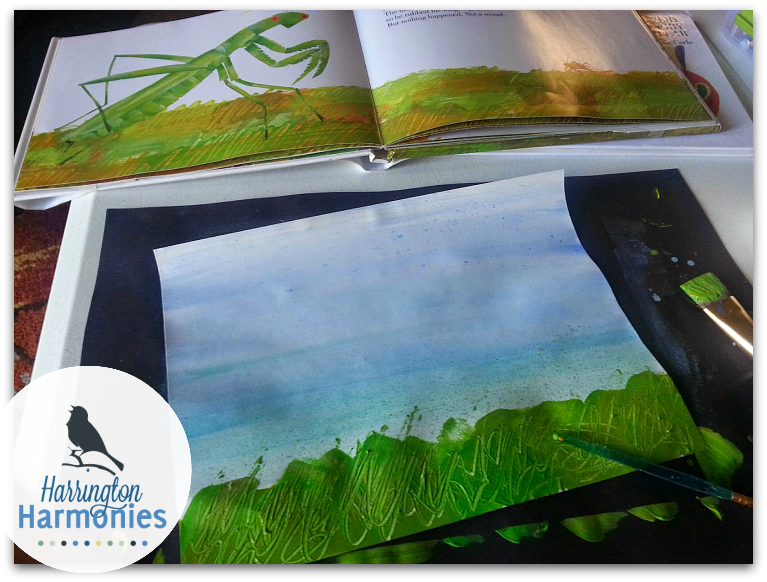
Picture Study:
For this part of the lesson, look at the oranges in The Very Hungry Caterpillar. Ask your children:
- What textures do you see? Are the brush strokes going the same or in different directions?
- How many colors do you see in the oranges? Which is the main color? How many shades do you see of orange?
- What else is there? Are there dots or splashes? How might you make those?
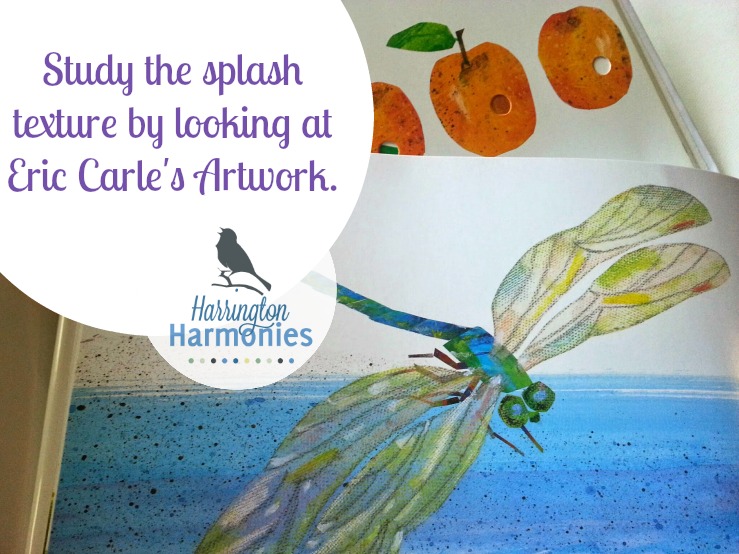 Next look at the dragonfly page in the Very Quiet Cricket. Ask the following:
- What is the dragon fly flying over? What gives the impression of water?
- How do you know where the water ends? This gives the feel of a horizon, or where the water stops.
- How many colors do you see in the water? What else do you see in the background?
Let them point out all the additional textures they see in that page if they like.
Make Your Own Color Wash and Splash Texture: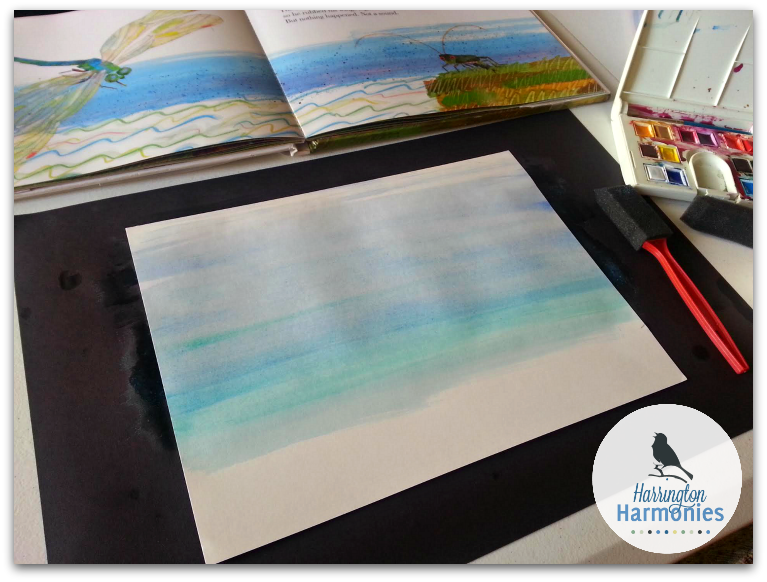
Have your child think about what insect picture they will make. For today, just have them decide if it will be a daytime picture or a night time picture. Here’s some pointers to help them with their decision:
- For a night time picture have them choose darker and colors for the wash and splash white or yellow paint for stars.
- If daytime what time of day? Is there a sunset? Then use yellows reds, pinks, oranges and purples in addition to blue.
- Is it an overcast day, or a sunny blue sky? Use varying shades of blue.
For this example, I’ll just use a regular daytime colors to keep it simple.
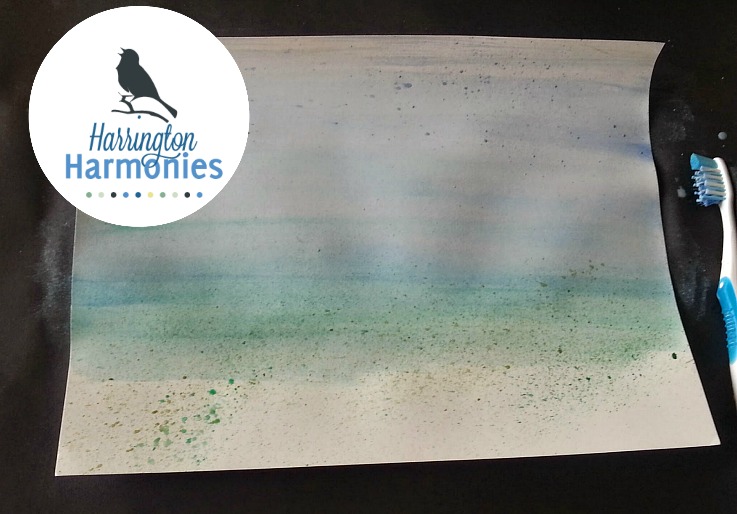
“Wash” your color on by brushing back and forth across your paper to create a sky background.
Using more or less water will determine the shade of your color. Dark is just as good as light, so it’s totally fine if your child’s painting is darker. Each one is unique!
*Tip 1: Have your child use 3 to 4 colors. I used green, a blue green, blue, and white.
*Tip 2: Be sure they use a large brush or sponge to “wash” the color on the paper. I like using these sponge brushes with kids for color washes.
Have your child leave portions of the paper white, especially on the bottom. Many children will want to finish the whole page and if they do that’s totally okay. You’ll just have to let it dry before going on to the next texture. Really, you just need a strip of color wash. The bottom will later be painted with a “grass or scratch texture” and the top can be left for a horizon if desired, such as with water or a sunset background. Leaving a little white and not filling up the entire paper is also okay!
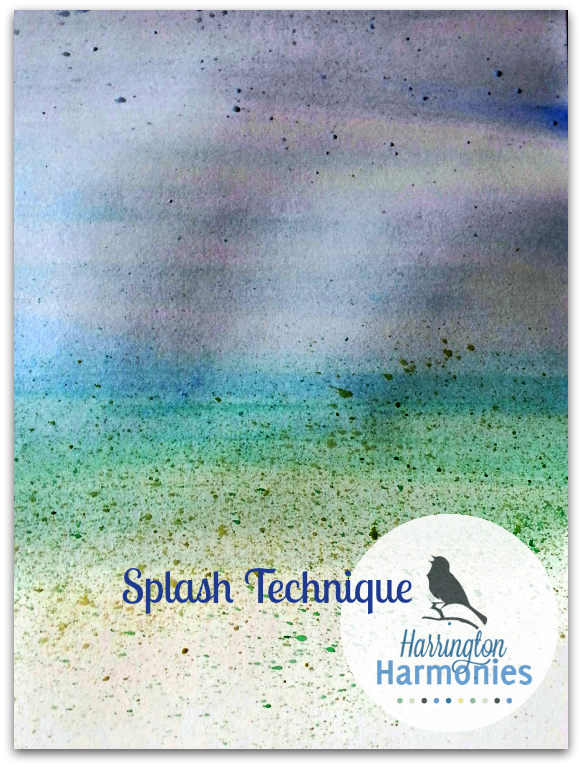 Next, splash desired colors over the color wash.
This is the really fun part and adds interest to your picture. You don’t need to go overboard and it takes but a second. It works really nice for the water background in the dragonfly page, but think of using colors that will add to your sky background. I used yellow and green on the bottom because it will go nicely into the grassy feel we will create tomorrow. Then I splashed a bit of very watery white to the top, hoping to create a warm misty summer feel in the place of clouds.
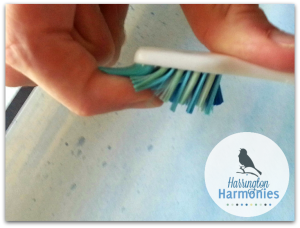 This technique can be created easily for kids with an old but clean toothbrush. Load the brush with the desired color or colors, and then create the splash by running your finger over the tooth brush. Always have the child test it first on a piece of scrap paper until they feel comfortable and then over the color wash in the area they desire.
A color wash will make most papers curl, sometimes even with watercolor paper. So, allow it to dry and then place a few book on it over night.
Visit tomorrow to see the next texture revealed!
Linked up for…